In this easy-to-follow, step-by-step tutorial, you will learn about the piping preparation basics, including how to prepare and fill a piping bag. Before you know it, your piping prep will become second nature.
Preparing a piping bag may seem like a daunting task to some, but honestly, it is easy. You just need to learn the basics. Luckily for you, I am here to show you the ropes.
So, let’s get started!
Here are some quick links in case you want to skip ahead to a specific section.
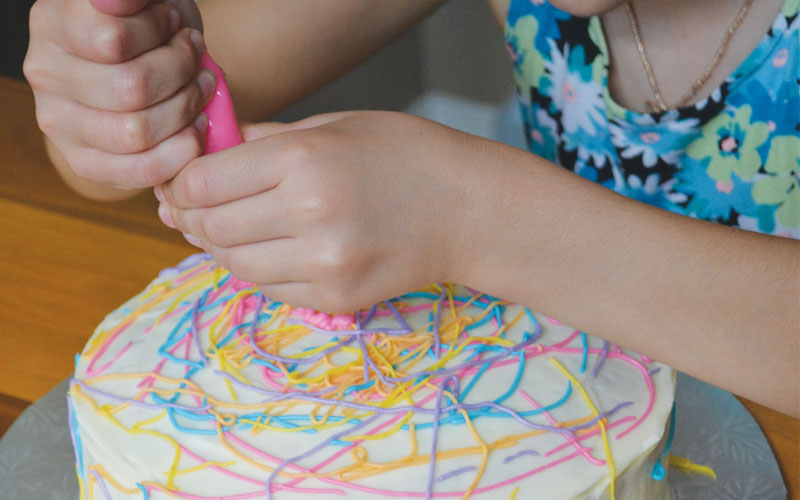
Piping is a type of decorating technique that applies frosting to cakes, cupcakes, and cookies using patterns, such as swirls, flowers, stars, and other shapes. You squeeze a piping bag to push frosting through the piping tip to sculpt your frosting as it comes out onto your cake, cupcakes, or cookies. To pipe frosting, you require a few essential tools.
Let’s jump into some more detail on each of the essential tools!
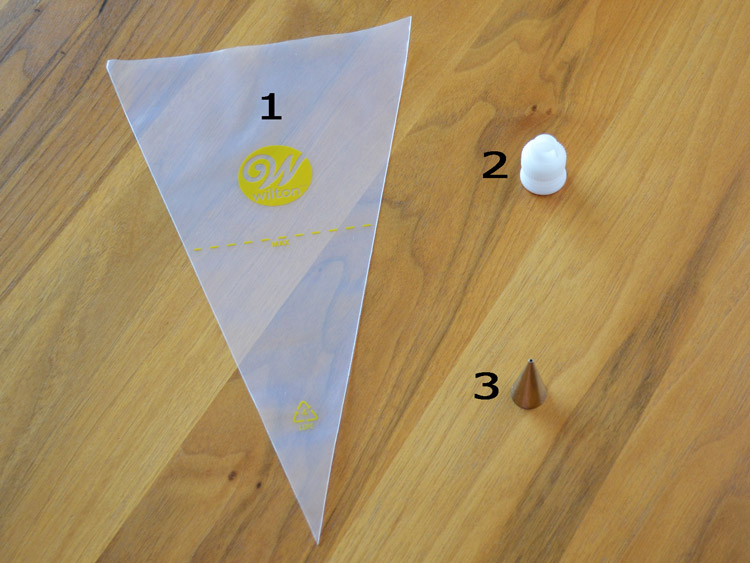
Piping Bags
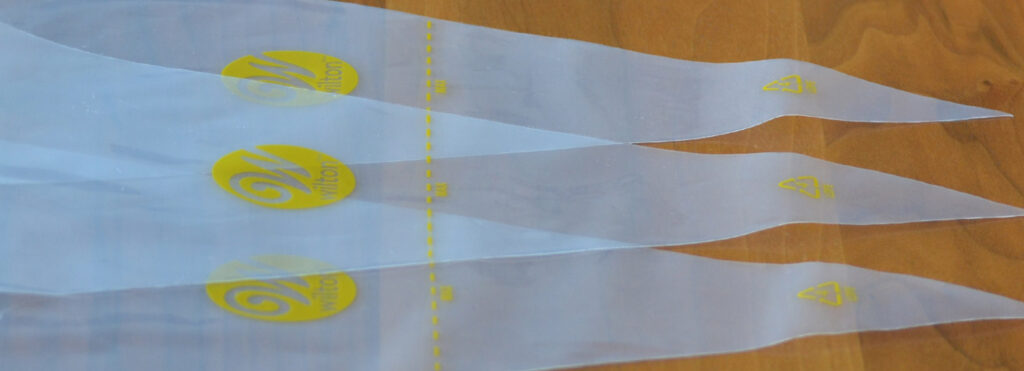
Piping bags, also called pastry bags or icing bags, are cone-shaped bags that hold your icing. They are either disposable or reusable. I prefer to use disposable bags as it makes for easy clean-up, especially when you use lots of them at once.
Picking the size of your piping bag depends on personal preference and what you are piping. Typically, you use a 12-inch or 16-inch piping bag.
This post may contain affiliate links, which means if you buy something, I’ll receive a small commission without additional cost to you. As an Amazon Associate, I earn from qualifying purchases. Thanks for your support!
Which Piping Bag should I use?
I prefer using a 12-inch piping bag for small tips (like the Wilton #16 open star tip). I have more control over the smaller bag when using a smaller tip. Also, when using many different icing colours, you often don’t need lots of icing in each bag. Therefore, a smaller piping bag is ideal for these types of tips. If you were to only put a bit of icing in a large piping bag, it would make it awkward to use.
However, the 16-inch piping bag is ideal for large piping tips, like the Wilton 1M tip. The opening of the 1M tip is much bigger than the small tips, so it requires lots of icing when using.
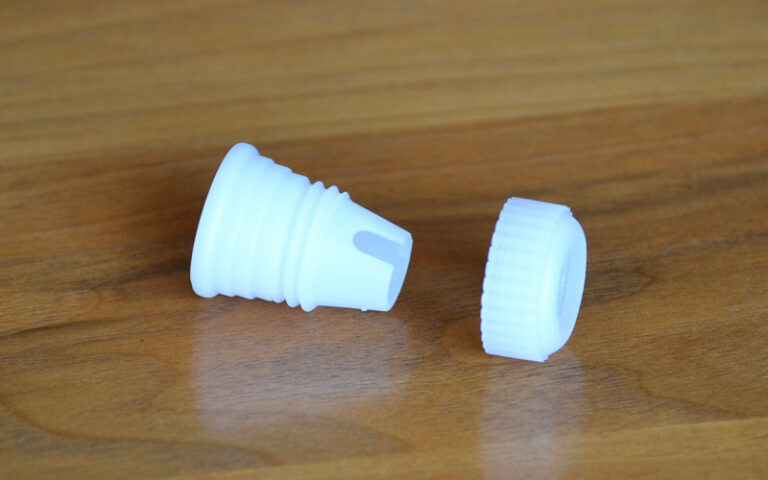
Couplers
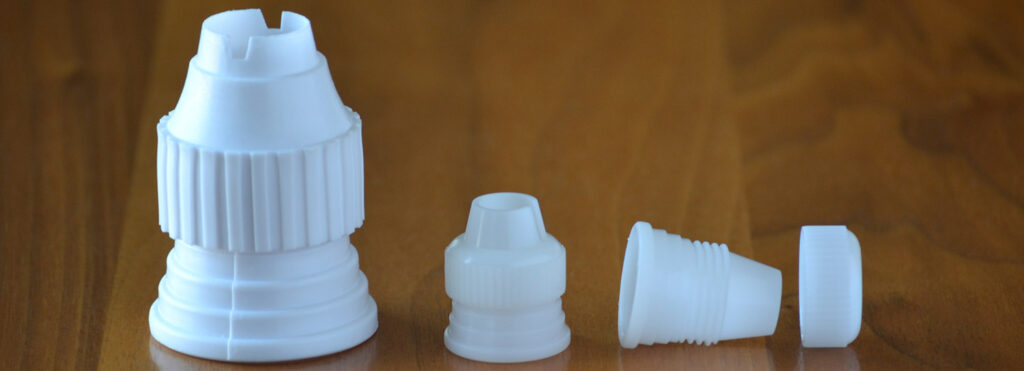
So, what exactly is a coupler? In a nutshell, a coupler is a device that connects your piping tip to your piping bag. It has two parts, the base, and the ring. The coupler base goes inside the piping bag, and the coupler ring goes around the piping tip, which then screws onto the coupler base. A coupler allows you to switch piping tips on your piping bag.
I use two sizes of couplers, small and large. The small couplers are for the small piping tips, and the large couplers are for the large piping tips.
Do I really need a coupler?
Some say you don’t need a coupler if you aren’t switching tips. However, I always use a coupler to make 100% sure that the piping tip is secure and does not shift. I have heard of people not using a coupler, which can be a disaster. The piping bag shoots icing off from the sides of the tip, or the whole piping tip flies out, which is less than ideal. These happen because the piping bag can stretch after prolonged use. I can honestly say; this has never happened to me because I always use a coupler.
Piping Tips
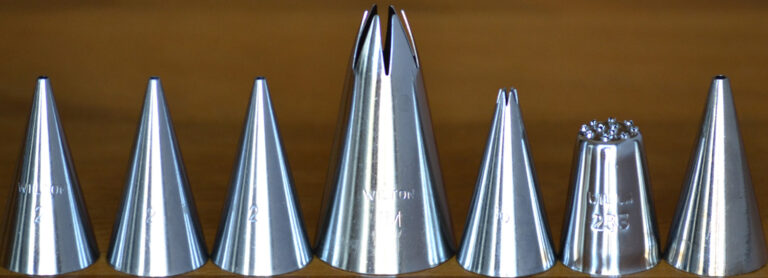
Piping tips, also known as decorating tips or icing tips, are the decorating nozzle at the end of your piping bag that sculpts your frosting as it comes out onto your cake, cupcakes or cookies. There are tons of different piping tips, but do you need all of them? I have a set, and I can honestly tell you that for my cakes and cupcakes, I only use a handful of them. However, I have lots of the same piping tips.
My rule of thumb is one piping tip per colour for detailed cakes. For example, if a cake requires piping tip #16 for three different colours, I recommend you have three of piping tip #16. I feel this is much easier and cuts down on time. However, one piping tip works if you use multiple couplers and clean the piping tip before switching to a new colour. Now, let’s check out my favourite piping tips.
Wilton Piping Tip #16 Open Star makes small stars, which are great for creating a character or design cake. Love this tip! I have lots of this piping tip, so I can have a piping tip for each colour of my piping bags when doing a detailed character or design cake. I recommend using the 12-inch piping bag and small coupler with this piping tip.
Wilton Piping tip #2 Round is great for outlining and writing on cakes, cupcakes and cookies. I have lots of these, but you only need 1 or 2 of them for most cakes or cupcakes. I have so many of these tips because we use them for decorating sugar cookies, and my kids LOOOOVE to decorate them with lots of different colours. Ok, it is not just the kids…so do I! I recommend using the 12-inch piping bag and small coupler with this piping tip.
Wilton Piping Tip #1M Open Star makes big rosettes, which are Awesome for cakes and cupcakes. These are my go-to tip for cupcakes. I have a couple of these piping tips for when I use more than one colour on my cakes. These are large piping tips; and will require a 16-inch piping bag and a large coupler.
Most of my piping tips are from Wilton, but I also have some Celebrate It piping tips from Michaels. Celebrate It tips are also made by Wilton.
Other Piping Tip Brands?
Not all piping tip brands have the same size standards. If you use another brand, the sizing may or may not be the same. For example, I have a no-name piping tip #2, which has a much bigger tip opening than Wilton or Celebrate It. It is comparable to the Wilton or Celebrate It piping tip #4. So….you may need to adjust your tip size when using another brand.
Now that you are familiar with the three essential tools, it’s time to put them together.
Prepare a Piping Bag
Preparing your piping bag is easy and after doing it a couple times, you will be a pro.
Before we start, you will need the following:
Piping bag – 12″ or 16″ (have a couple extra on hand)
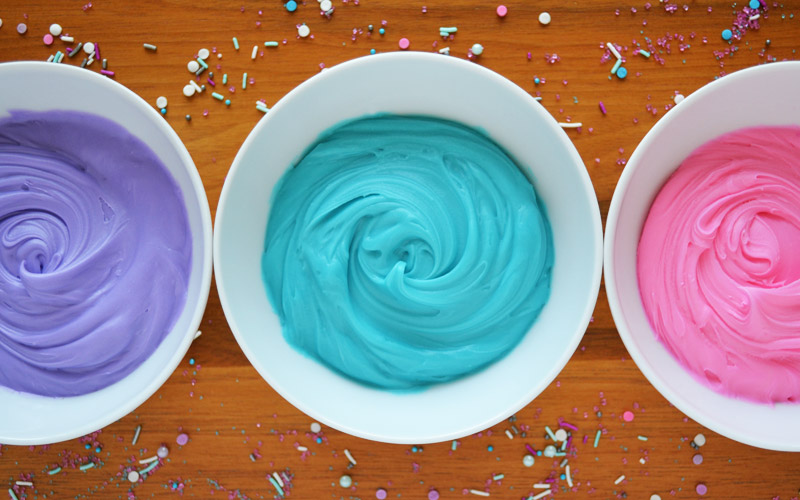
Betty Crocker Creamy Deluxe French Vanilla Icing (chill in refrigerator for 30 minutes prior to piping). I always use Betty Crocker Creamy Deluxe French Vanilla Icing, but you can use any medium consistency icing that you prefer.
Scissors.
Now, let’s jump right in.
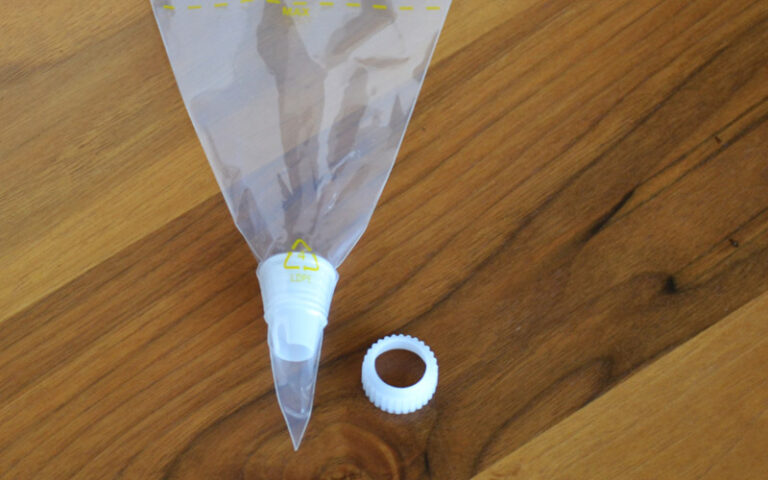
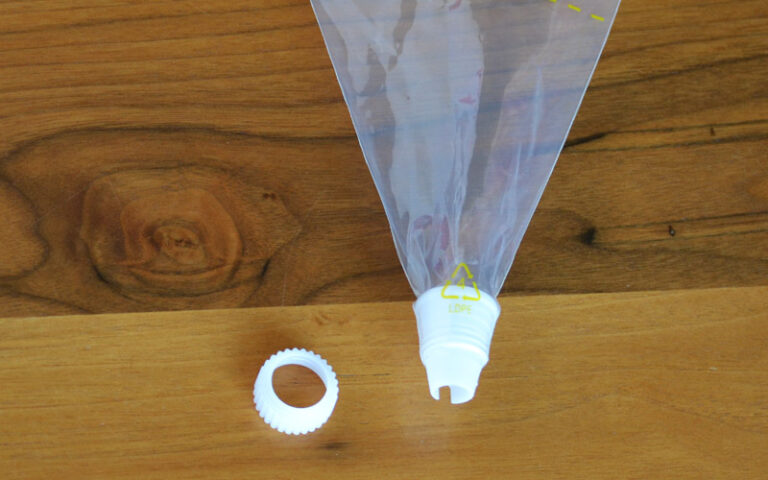
1. Unscrew the coupler ring from the coupler base.
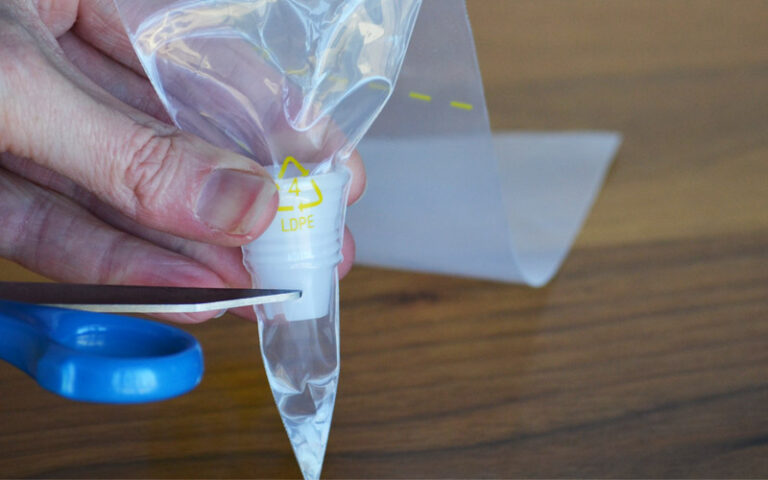
2. Place the coupler base in the piping bag with the narrow part down and push the coupler base to the tip of the piping bag, as far as it will go.
3. Slide the open scissors back and forth to mark your cut line on the piping bag. The mark should be halfway between the coupler opening (narrowest part) and the start of the coupler threads for a small 12-inch piping bag. NOTE: For a large 16-inch piping bag, the mark should be 1/4 way from coupler threads to the coupler opening.
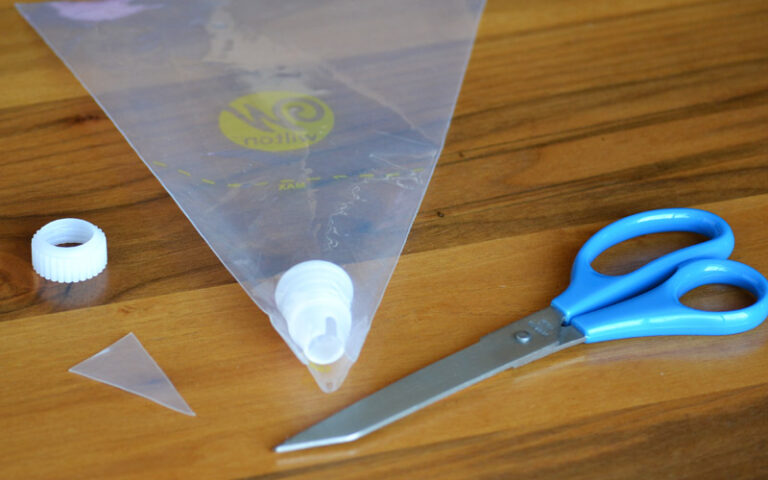
4. Push back the coupler base from the opening and cut along your mark.
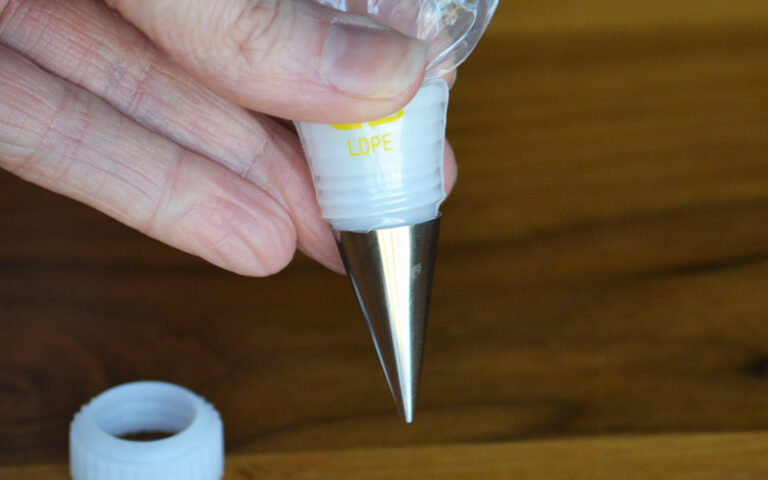
5. Slide the coupler base into the opening (narrow part down) as far as it will go. The piping bag should be snug around the coupler base.
6. Place your desired piping tip onto the coupler base.
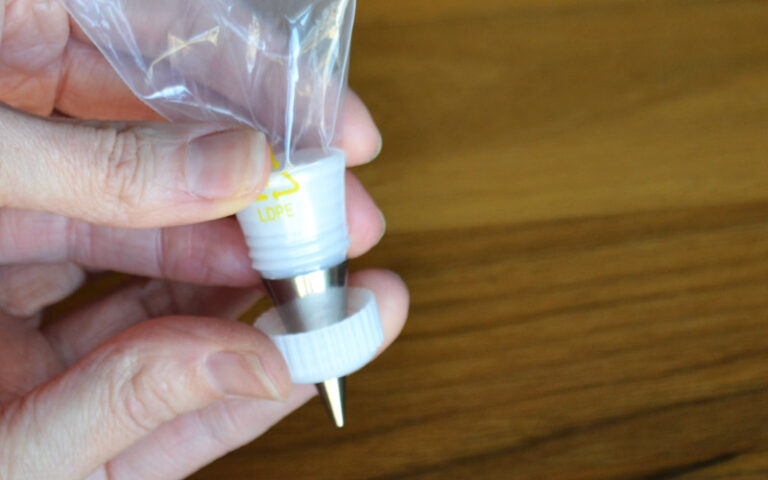
7. Slide the coupler ring over the piping tip and screw it onto the coupler base. Make sure it is tight. NOTE: The piping tip should be secure and not wiggle. When using large couplers, you need to cut more of the piping bag off to get the coupler ring tight and the piping tip firm. Be sure to cut a little bit at a time, if necessary.
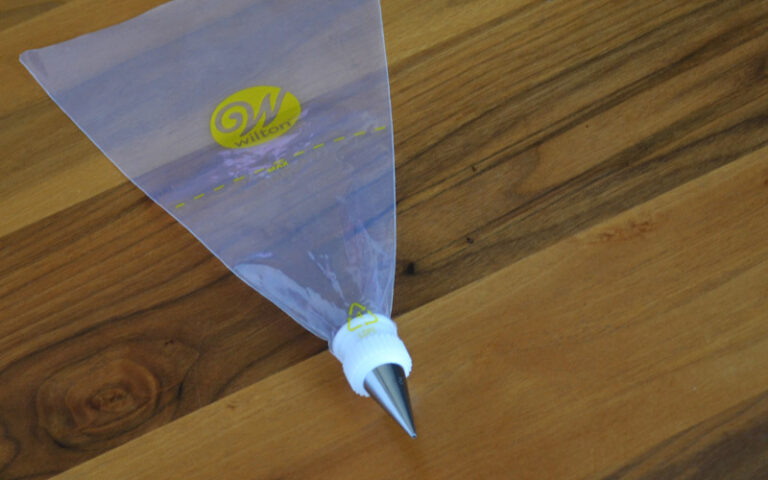
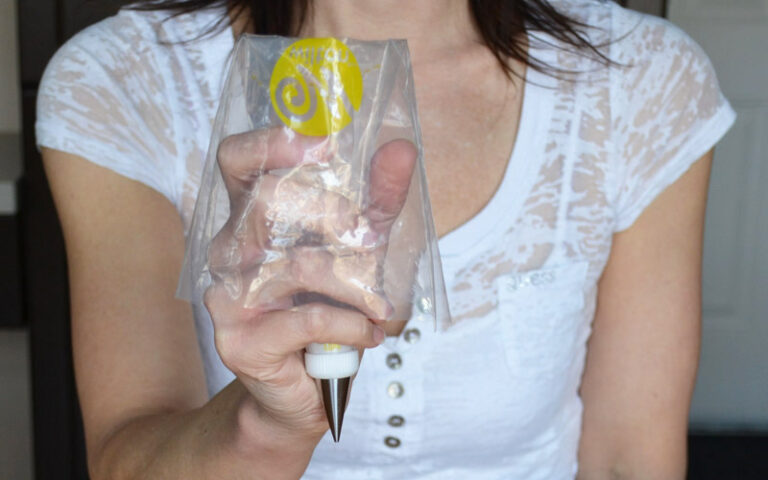
8. Here is what your assembled piping bag should look like.
Awesome…you just got your piping bag ready. Now, it’s time for the Yummy Icing!
Fill a Piping Bag
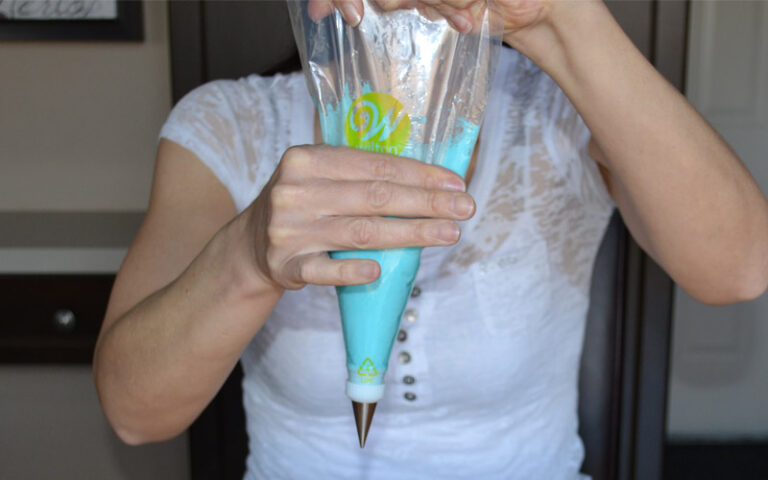
1. Fold the top of the piping bag (wide opening) over your hand about halfway down to make a cuff.
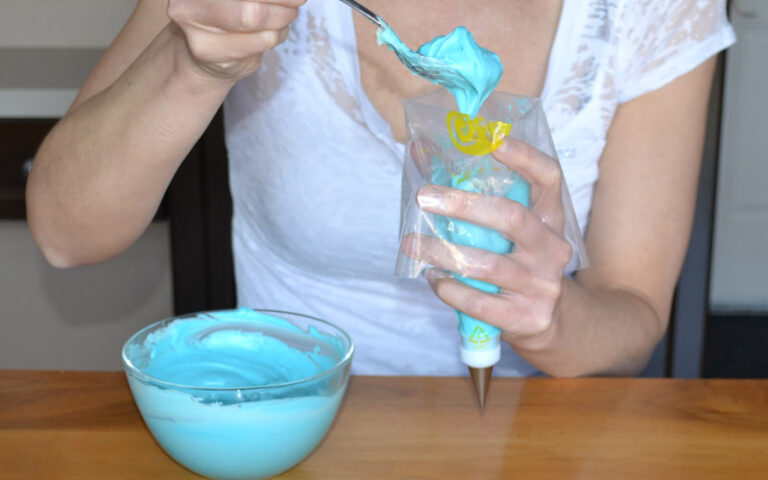
2. Use a spoon or spatula to put your icing in the piping bag. IMPORTANT: Make sure not to overfill the piping bag. I use Wilton piping bags, which conveniently have a dotted line to help with this. It does not have to be right on the line; it is simply a guide. No dotted line? No problem. My rule of thumb is to fill up to 1/2 of the piping bag with icing. It is very tempting to put lots of icing in the piping bag, but trust me, it’s not worth it! If you overfill, you will find it harder to squeeze and control. Even more importantly, your hand will warm the icing, and your piping designs will be less crisp.
3. Pinch the spoon or spatula between the piping bag, to remove the excess icing, as you pull your spoon/spatula out of the bag.
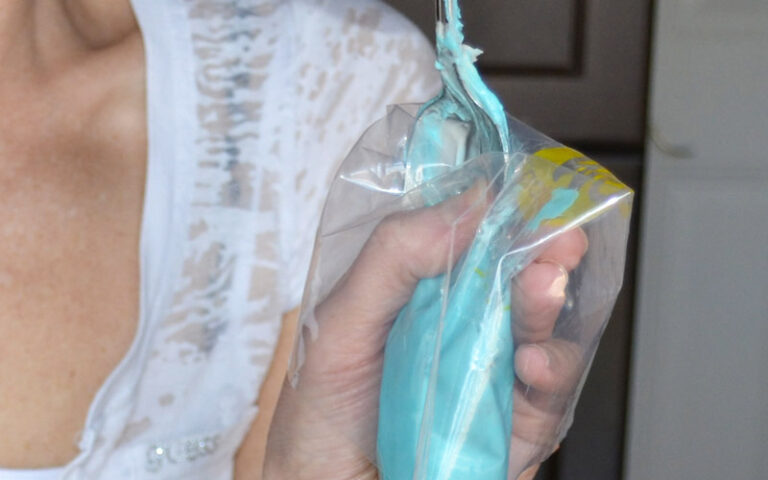
4. Unfold the top of the piping bag back to normal and lightly push the icing towards the tip.
5. Put the piping bag between your fingers and thumb and pull all the icing towards the tip. Go slowly, and make sure the icing does not come out of the piping tip. IMPORTANT: If you see air pockets, squish the icing around in that area to get rid of them. If there are air pockets while you pipe your icing, the air can spurt out with the icing.
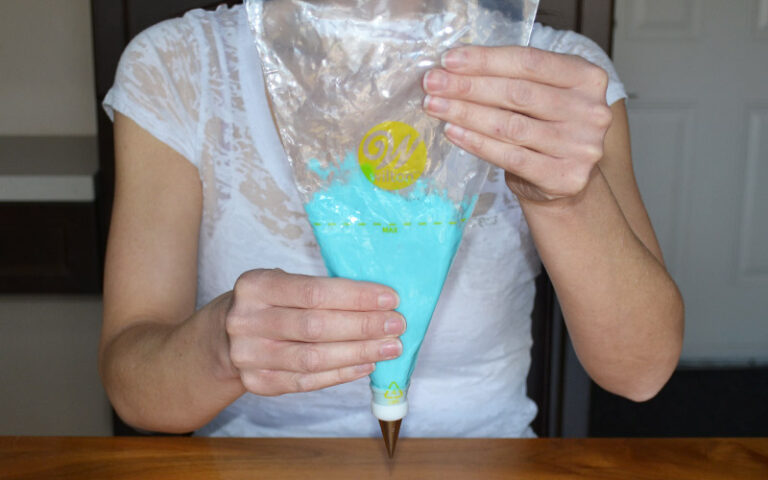
6. Twist the top of your Piping bag and you are done!
Great! You did it! Now, you are ready to start piping!
Mama's Helpful Tips
Have a couple more piping bags on hand than needed
Always use a coupler
Use 1 piping tip per colour for detailed cakes
Chill icing for 30 mins before piping
Only fill up to 1/2 of the piping bag with icing
Try to eliminate any air pockets before piping
When refilling the icing bag, use a spoon or spatula to help open up the bag
If you prefer a piping tip set, I recommend Wilton’s Decorating Tip Set. It has many piping tips, including tips #2, #16, #233, and small couplers, all in a convenient plastic organizer case.