Personalized Art-inspired Loot Bags for any Party

Art Loot Bags

Posted in Kid’s Loot Bags Art-inspired Loot Bags

This post may contain affiliate links, which means if you buy something, I’ll receive a small commission without additional cost to you. As an Amazon Associate, I earn from qualifying purchases. Thanks for your support! 

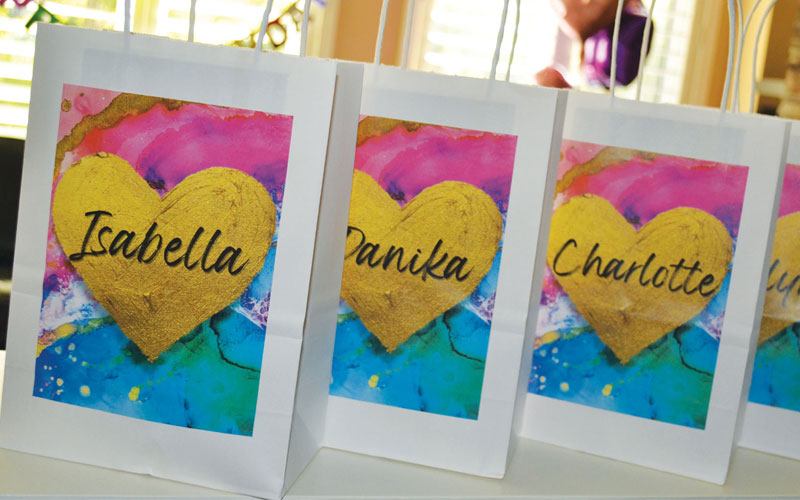
Kids always love getting loot bags at the end of the party. Personalize them for an extra added touch. They love it! In these art-inspired loot bags, we included:

They also get to take home anything that they made at the Party! See Kid’s Party Activities.

Some other options are:

Once you have decided on what you are giving in your loot bags, you can determine your Loot Bag size and whether you would like a Loot Bag Cover or Tag. The Cover is glued to the front of the Loot Bag, while the Tag hangs from the Loot Bag handle.

Select your Free Personalized Art-inspired Loot Bag Cover or Tag

Free Personalized Loot Bag Cover

How to Personalize Your Loot Bag Cover

Play Video

For printing the 5″ x 7″ loot bag cover, you need the 5″ x 7″ on 11″ x 8.5″ Printing TemplatePrint it on regular paper. Check out more of Mama’s Printing Tips.

Assembly of Loot Bag Cover:

  1. Cut out the image with a paper cutter.
  2. Paste to the front on the Loot Bag. (Use extra strength glue)

Free Personalized Loot Bag Tags

For printing the 4″ x 3″ loot bag tags, you need the 4″ x 3″ on 11″ x 8.5″ Printing Template and for printing the 3″ x 3″ loot bag tags, you need the 3″ x 3″ on 11″ x 8.5″ Printing TemplatePrint it on white cardstock, or print it on regular paper and glue it to cardstock. Check out more of Mama’s Printing Tips

Assembly of Loot Bag Tags:

  1. Cut out the image with a paper cutter.
  2. If you printed on regular paper, cut your cardstock a bit larger to allow for a border. Make sure the border size is consistent. Then using extra strength glue, paste the Loot Bag Tag to the cardstock.
  3. Make a hole in the top corner with a hole punch. The top of the tag is the first letter of their name. 
  4. Put a ribbon through the hole of the Loot Bag Tag and attach it to the handle of the loot bag.

Include a Thank You

A great way to thank your guests is to include a Personalized Thank You in their Loot Bag.

Free Personalized Thank you Tag

For printing the 3″ x 2″ Thank You Tags, you need the 3″ x 2″ on 11″ x 8.5″ Printing Template. Print it on white cardstock, or print it on regular paper and glue it to cardstock. Check out more of Mama’s Printing Tips.

Assembly of Thank You Tags:

  1. Cut out the image with a paper cutter.
  2. If you printed on regular paper, cut your cardstock a bit larger to allow for a border. Make sure the border size is consistent. Then using extra strength glue, paste the Thank You Tag to the cardstock. This border will enhance the finished look.
  3. Make a hole in the top corner with a hole punch. The top of the tag is where you start reading. 
  4. Put a ribbon through the hole of the Thank You Tag, and then attach it to a gift in the Loot Bag.

Be Inspired and make your own Priceless Party!

I would love to hear about your Art-inspired Loot Bags! Please share your pictures and comments below.

Mama's Helpful Tips

  1. When printing, you must use the proper printing template.
  2. Print at a print shop, such as Staples, for a more professional look and great colour quality.
  3. Paper choices:
    • Loot Bag Tags, Thank You Tags – Print on white cardstock, or print on regular paper and glue to cardstock.
    • Loot Bag Cover – Print on regular paper
  4. Use a paper cutter for a professional look.
  5. Always use extra strength glue.
  6. Have Fun!

Now what? Check Out These

Leave a Comment

Your email address will not be published. Required fields are marked *